Set Up Raspberry Pi 4 through laptop/pc using Ethernet cable(No Monitor, No Wi-Fi)
Contents
In this we shall be working with Raspberry Pi 4 Model-B of 1Gb RAM for the set up. Raspberry-Pi is a single board computer used for educational purposes and DIY projects with an affordable cost, requires a power supply of 5 volts with 3 amps current.
Operating Systems like Raspbian OS, Windows, Linux, RISC OS, can be installed into it. The Pi 4 model has Ethernet, wireless adapter, USB type-C port, and 40 GPIO(General Purpose Input Output) pins. Unlike the older versions the performance has very much improved with the “Pi 4” model.
Hardware Requirements:
- Raspberry Pi 4 Model B (1/2/4 GB RAM)
- USB Type-C power supply
- Ethernet cable (1 meter)
- Personal computer
Steps to install the required software tools
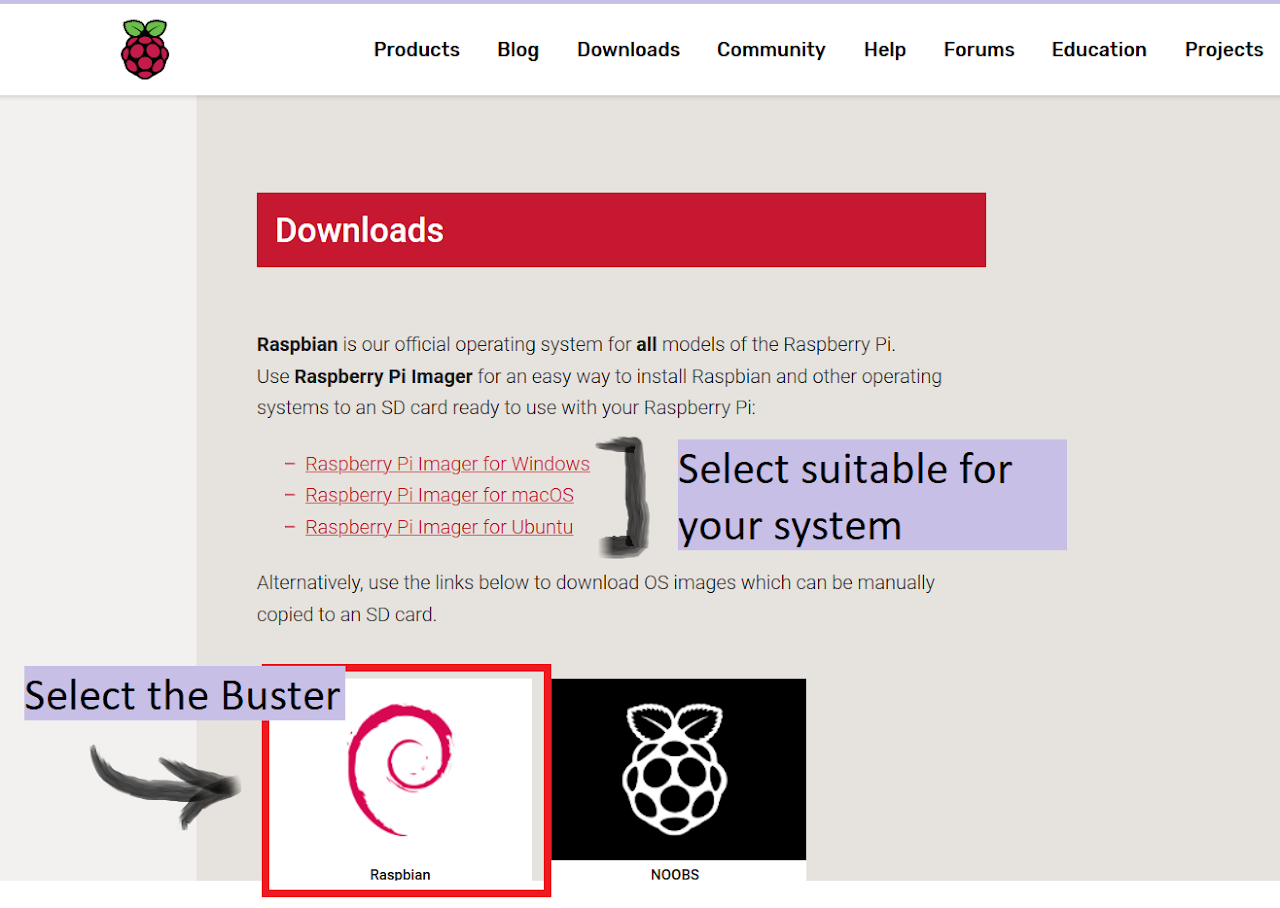
Step-1: OS Download
From the official raspberrypi.org1 download the Raspbian Buster operating system
Step-2: Imager
Also download the Raspberry Pi Imager2 from the same website, this is for writing the image file onto the SD card.
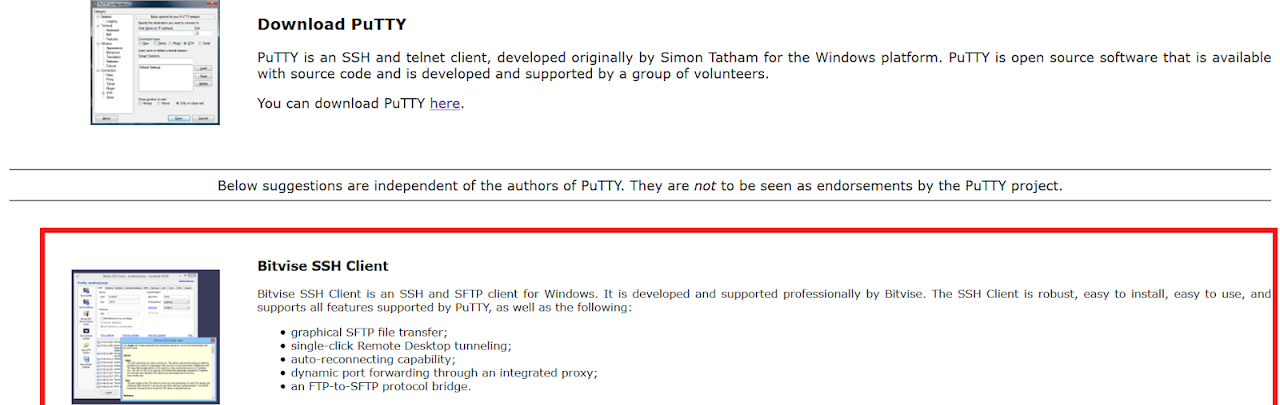
Step-3: SSH Client Download
If you are using windows you probably have to download the ssh client, I prefer downloading Bitvise ssh client from PuTTY3.
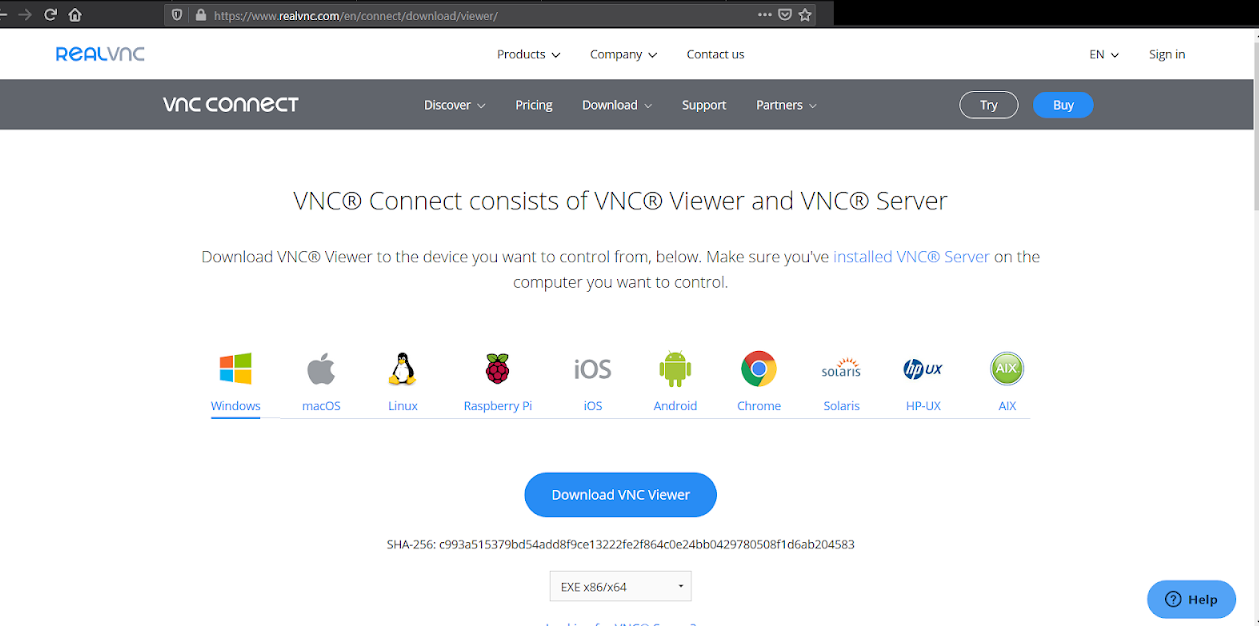
Step-4: Real VNC Viewer
To access the desktop of the pi, you can either connect a micro to HDMI connector from the pi to a monitor or you can access it remotely on your PC/laptop. To connect remotely VNC-server has to be installed onto the pi by default the VNC-server is installed within the operating system, in order to view it remotely one has to download VNC-Viewer4 on his/her Desktop.
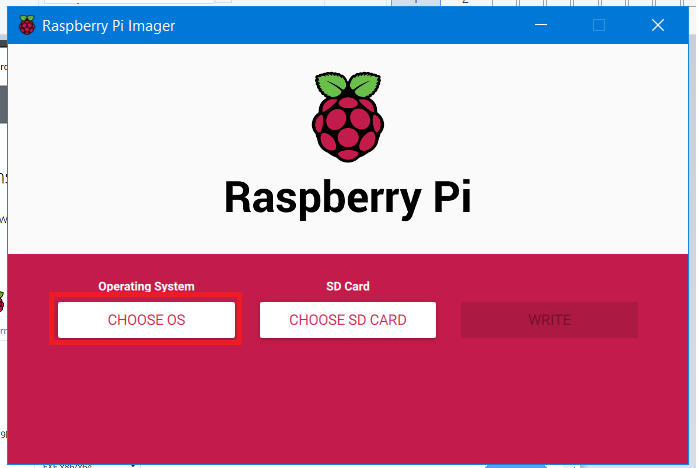
Step-5: Image Burning
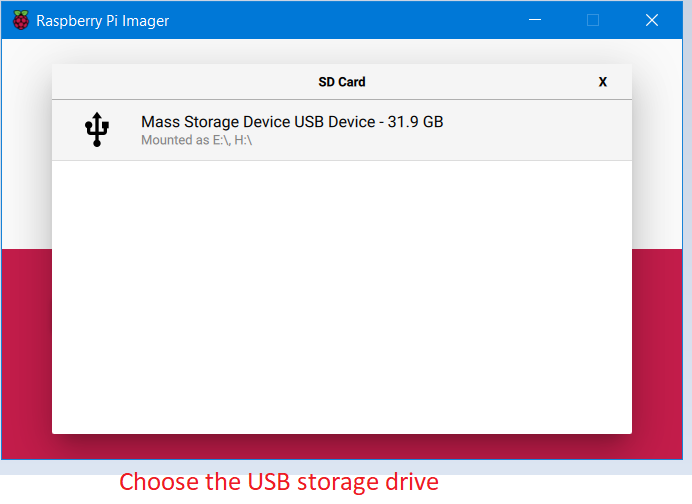
Open the Raspberry Pi Imager and select the custom setup then select the OS from the Downloaded folder and carefully set the target as USB drive. Wait for the image to be written on the drive.
 |
 |
 |
|---|---|---|
| 1 | 2 | 3 |
 |
 |
|---|---|
| 4 | 5 |
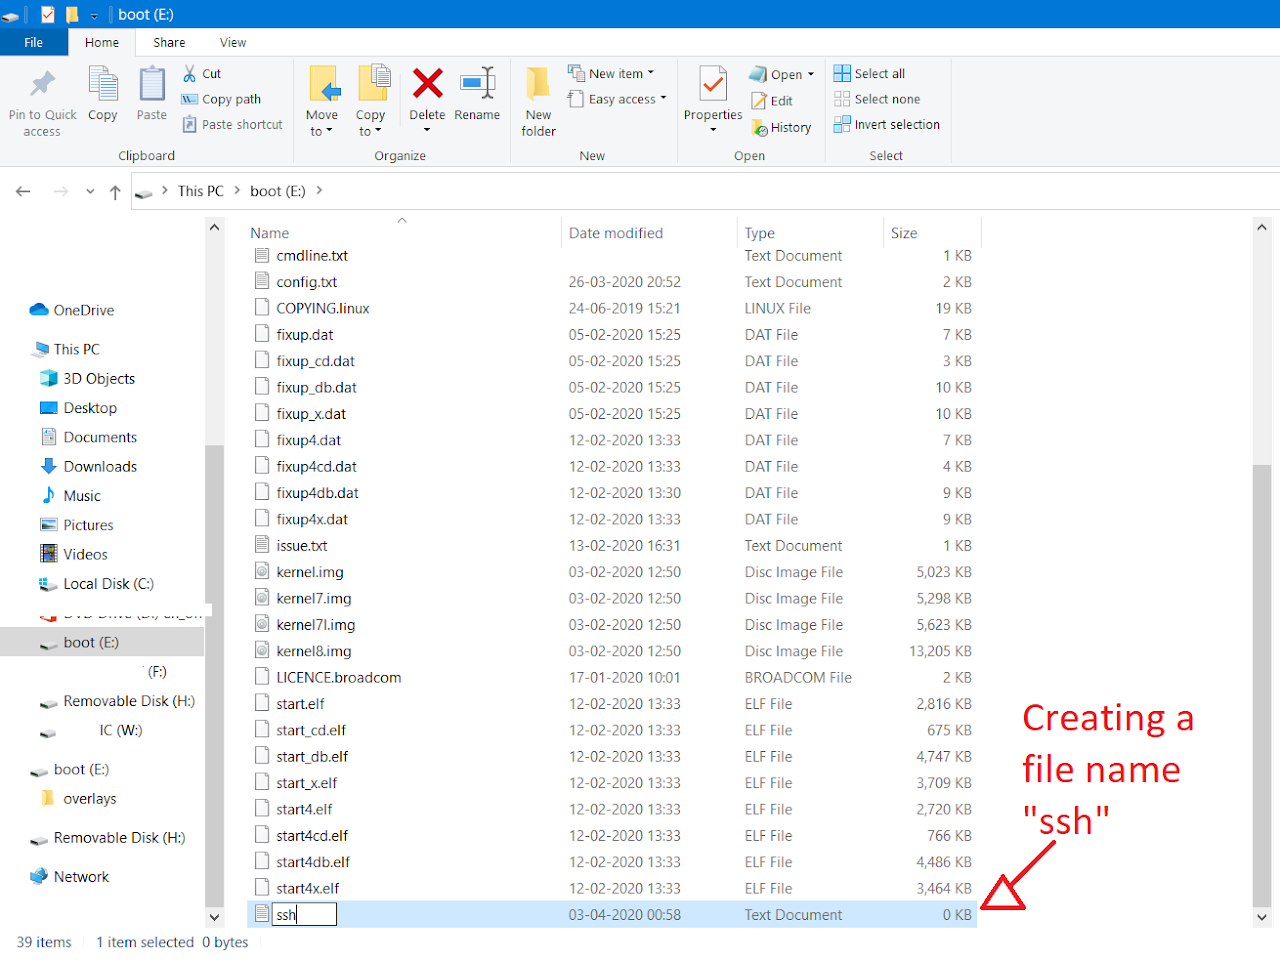
Step-6: ssh
After done, open the boot folder, create a new document named ssh without any extensions, save and then unmount the drive.
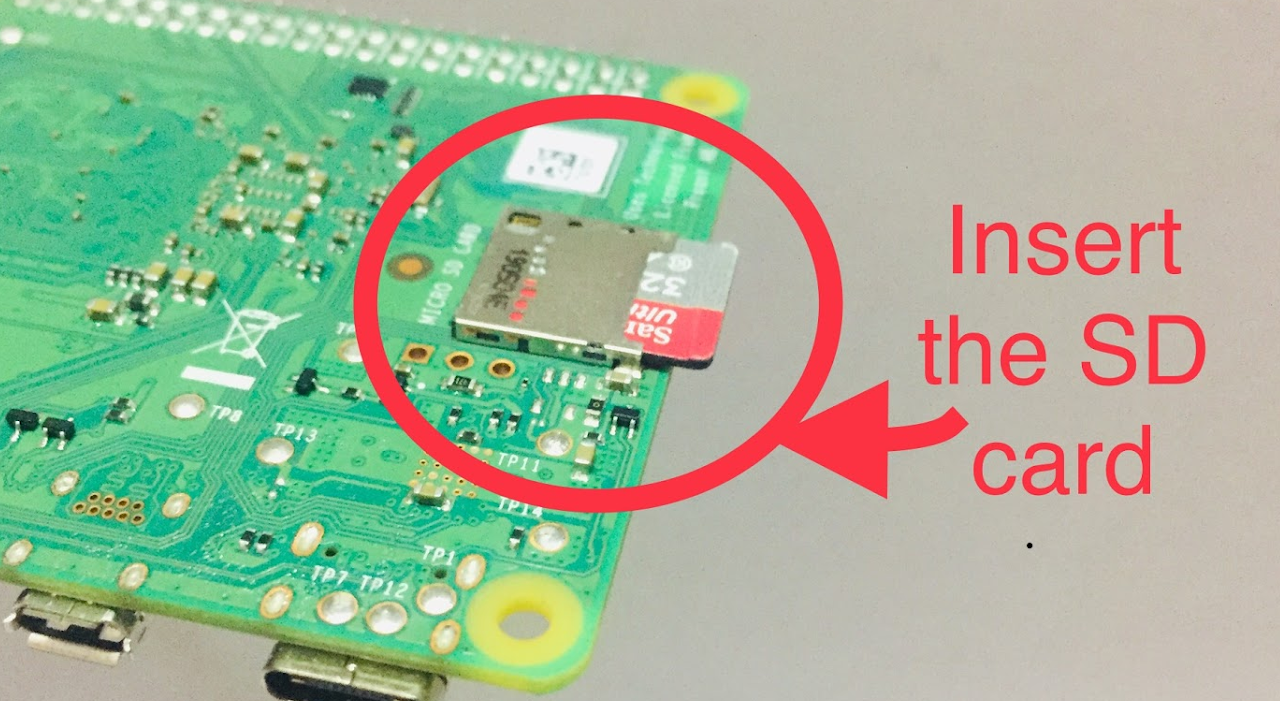
Step-7: Power
Now connect the Ethernet cable to your PC/lap and power up the pi with the type-C cable.
 |
|  |
|  — | — | —
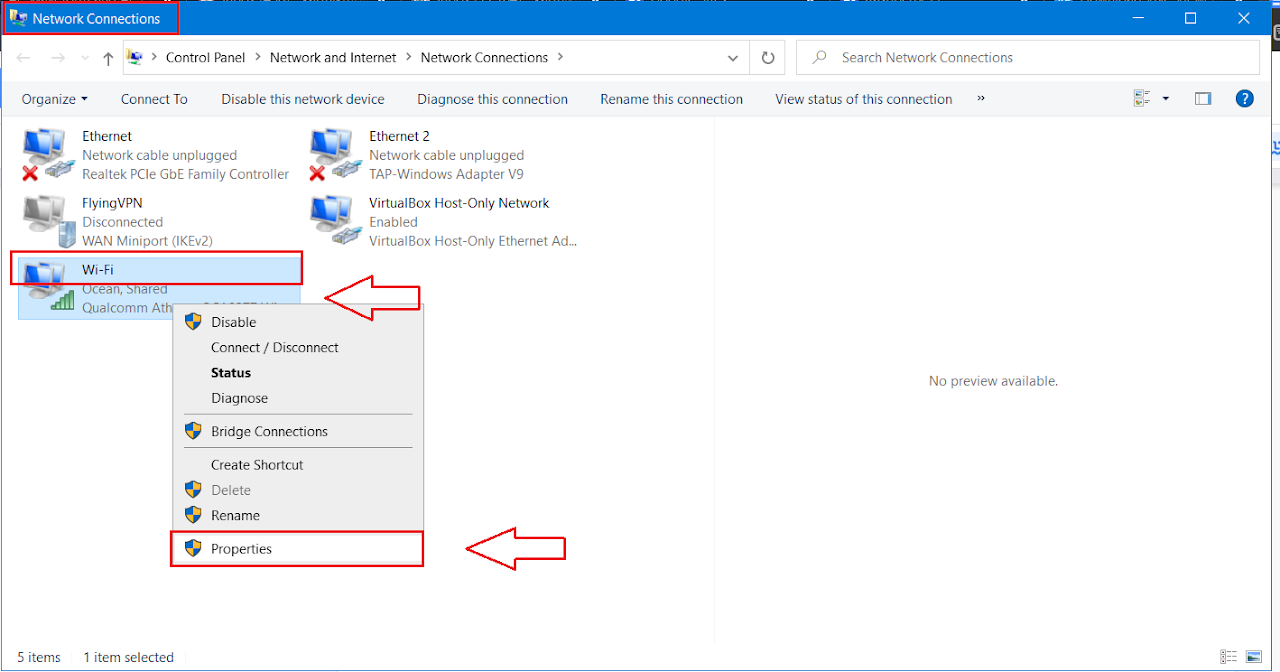
Step-8: Network Connections
If you are using Windows 10 go to Control Panel –> Network and Internet –> Network Connections, right-click on Wi-Fi select properties, go to sharing section and check on “Allow other network users to connect through this computer’s Internet connection”. Make sure that Home network connection is Ethernet. Save and close the window.
 |
|  — | —
— | —
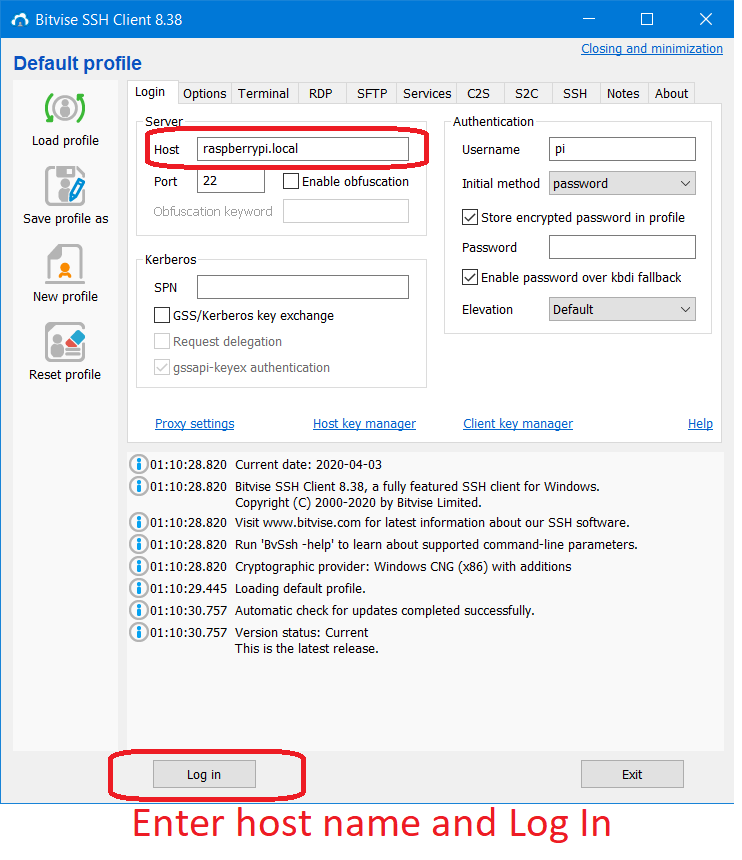
Step-9: SSH Configuration
Open the Bitvise SSH Client, enter raspberrypi.local or the IP address(from previous step) as host and leave 22 as default port in the server section.
Step-10: Authentication
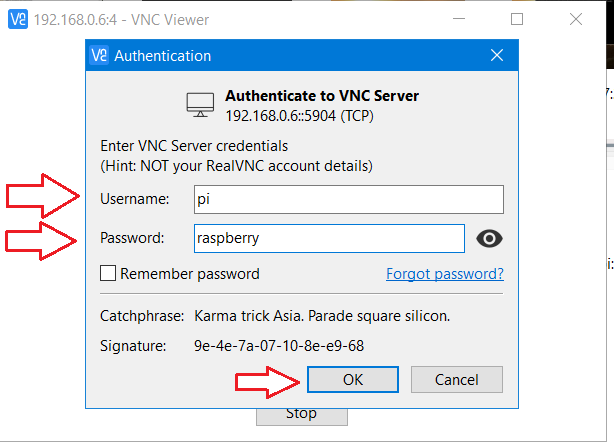
Click Log in and enter username as pi and the default password as raspberry. A terminal pops up and you are now into the Raspberry Pi.
 |
|  — | —
— | —
Step-11: Pi Terminal
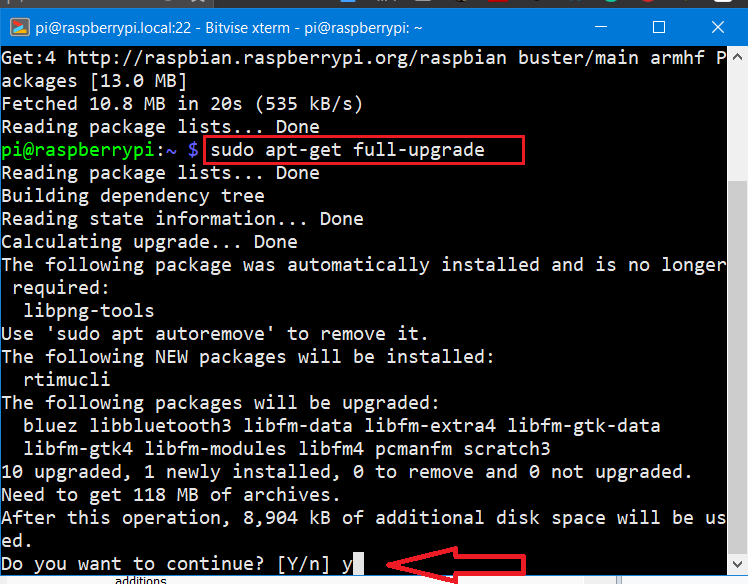
If this is your first time logging into pi make sure to update your pi by issuing the command sudo apt-get update and then sudo apt-get upgrade to upgrade.
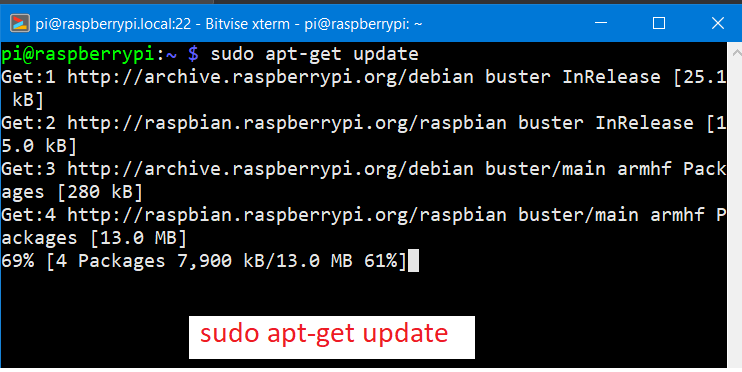
Quick tip: Don’t forget to change your password once you are log in.
Accessing Pi Desktop Remotely
- Go to terminal and type
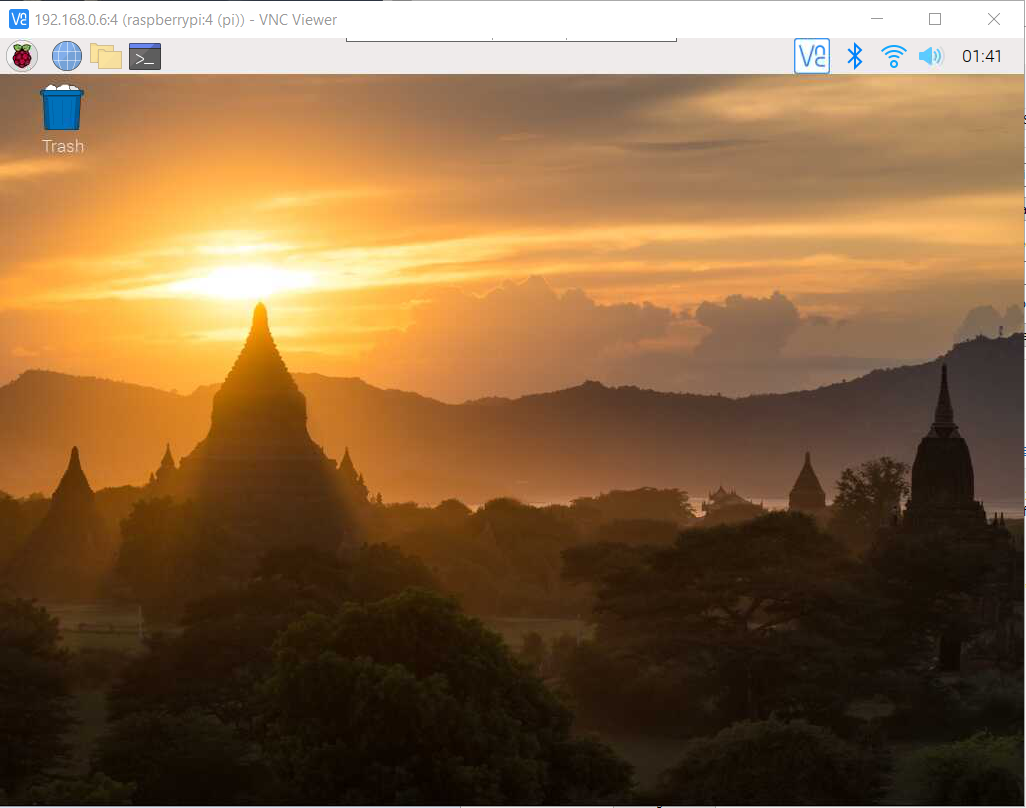
vncserver, notedown the generated ip address. Now open VNC-Viewer on your desktop and enter the ip addressor paste it, after few seconds a window pops sharing the screen of raspberry pi.
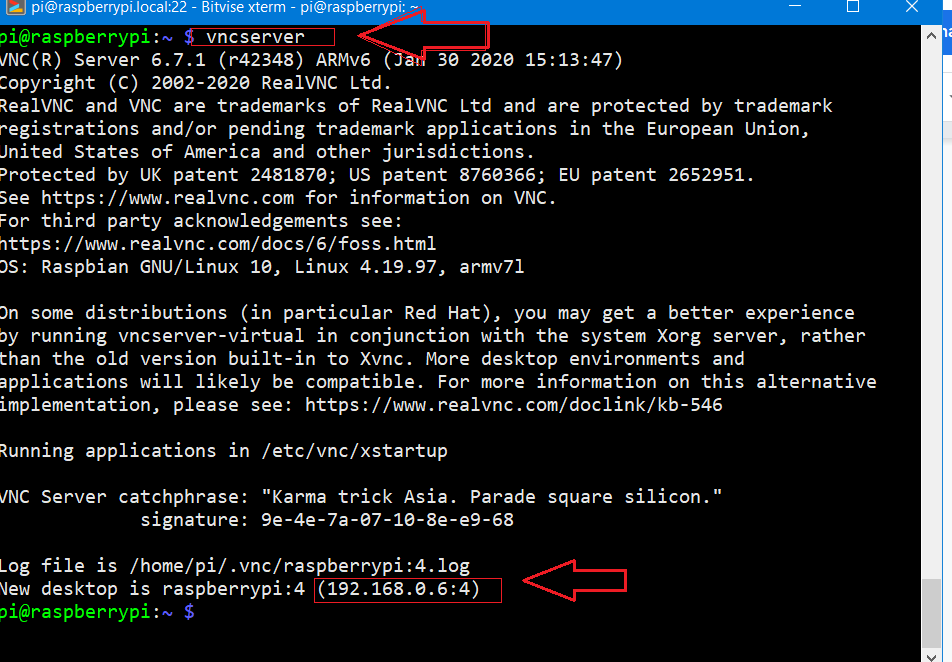
- Enter the ip address given by
vncserverfrom the raspberry pi to vncviewer application on your pc.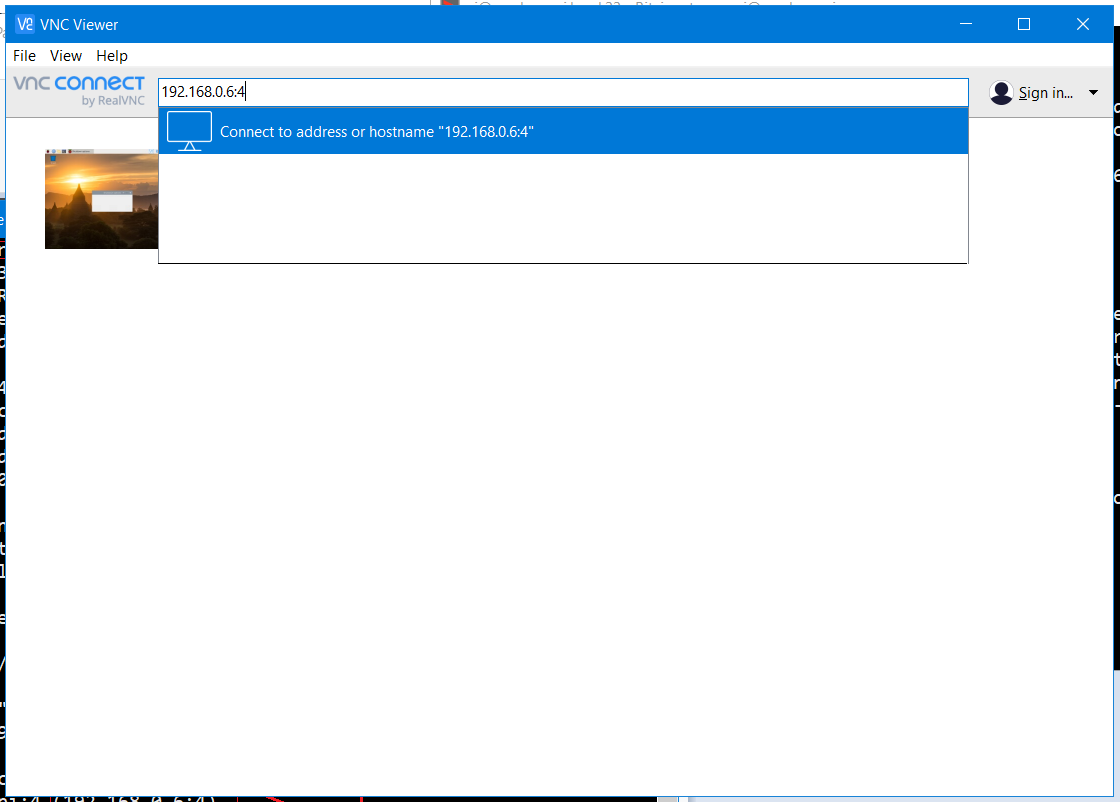
Enter the username and password on the authentication prompt.
-
Welcome! to Pi’s desktop.
-
This article was originally published in instructables website5.
References:
-
https://www.raspberrypi.org/software/ ↩
-
Set Up Raspberry Pi 4 Through Laptop/pc Using Ethernet Cable(No Monitor, No Wi-Fi) ↩